Define Permissions for a Role
A Role is a collection of permissions that controls what features or resources a user can access, and what actions they can perform (view, create, update, and so forth).
A permission comprises two parts: a resource and an access level. A resource refers to a Loyalty object or feature, such as an Offer, Reward, or Challenge. The access level determines what actions a user can perform on that resource. The available access levels are:
-
Read: Users have view-only access to this resource.
-
Write: Users can view resources, create new resources, and update the properties of existing resources.
-
Admin: Users have full access to this resource, including deletion.
If permissions to a resource are not granted to a Role, then the User Accounts who have been assigned to that Role will not have access to that resource.
Add Permissions to a Role
The platform supports two methods of adding permissions to a Role. First, you can add the permissions one at a time for specific resources. Second, you can automatically add permissions for all remaining resources to the Role.
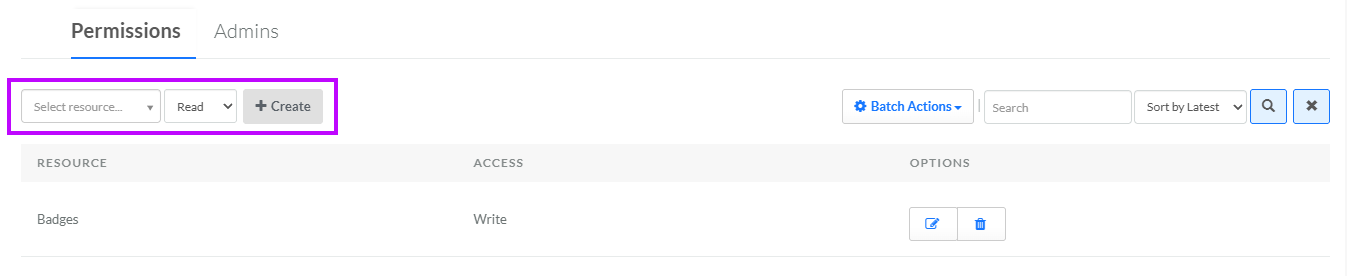
Individually Add Permissions
When adding permissions individually, you can customize the permission level for each resource as you add them. This method is useful for Roles that only need to access a few resources, or if the access levels vary between different resources. To individually add new permissions to a Role:
-
Select Admin from the top navigation bar, then select Access > Roles from the side navigation menu. The Roles screen is displayed.
-
Optionally, search for and select the desired Role (see Search for a Role for more information on the available search options). The Role Details screen is displayed with the Permissions tab selected.
-
From the Resource drop-down menu, select the desired platform resource.
-
From the Level drop-down menu, select the access level: Read, Write, or Admin.
-
Click Create. The permission is added to the list on the Permissions tab.
-
Repeat the above steps as needed to add other permissions to this Role.
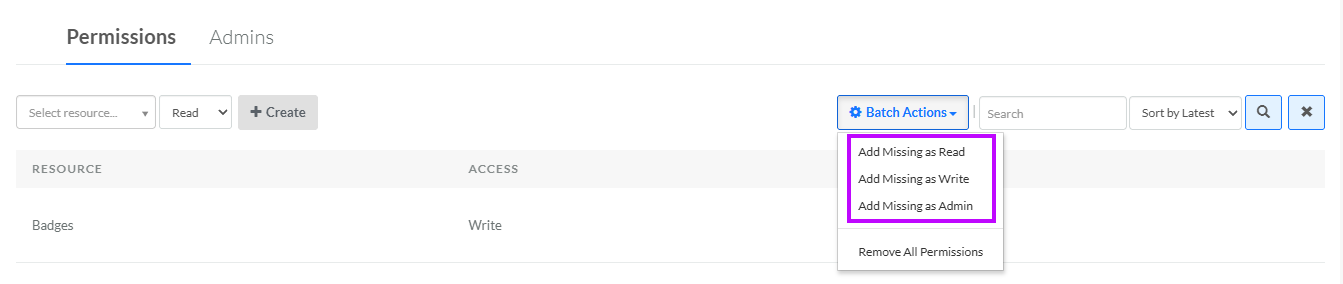
Batch Add Permissions
Instead of adding permissions one at a time as described above, the platform allows you to automatically assign permissions for all remaining resources that have not yet been added to the Role. This method is of course much faster than adding permissions one at a time, but with the restriction that all resources added in this manner will be assigned the same access level. This method is useful for Roles that require the same access level to many resources.
To batch add all remaining resources to a Role:
-
Select Admin from the top navigation bar, then select Access > Roles from the side navigation menu. The Roles screen is displayed.
-
Optionally, search for and select the desired Role (see Search for a Role for more information on the available search options). The Role Details screen is displayed with the Permissions tab selected.
-
From the Batch Actions drop-down menu, select the desired access level for the resources being added: Add Missing as Read, Add Missing as Write, or Add Missing as Admin. A confirmation dialog box is displayed; click Confirm. The permissions are added to the list on the Permissions tab.
Edit a Permission in a Role
The platform allows you to change the access level for an existing resource in a Role.
To change the access level for a resource:
-
Select Admin from the top navigation bar, then select Access > Roles from the side navigation menu. The Roles screen is displayed.
-
Optionally, search for and select the desired Role (see Search for a Role for more information on the available search options). The Role Details screen is displayed with the Permissions tab selected.
-
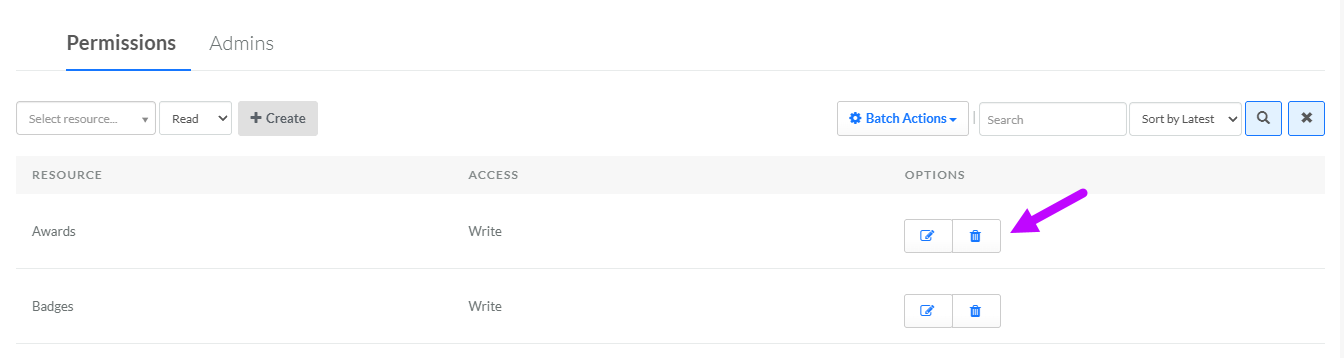
Optionally, search for the desired resource by entering all or part of the resource Display Name or Internal Name in the search field. Click the Search icon. The screen is refreshed to show only the resources that meet your search criteria.
-
To sort the search results, select the desired sort order from the Sort By drop-down menu. The default sort order is by most recently added.
-
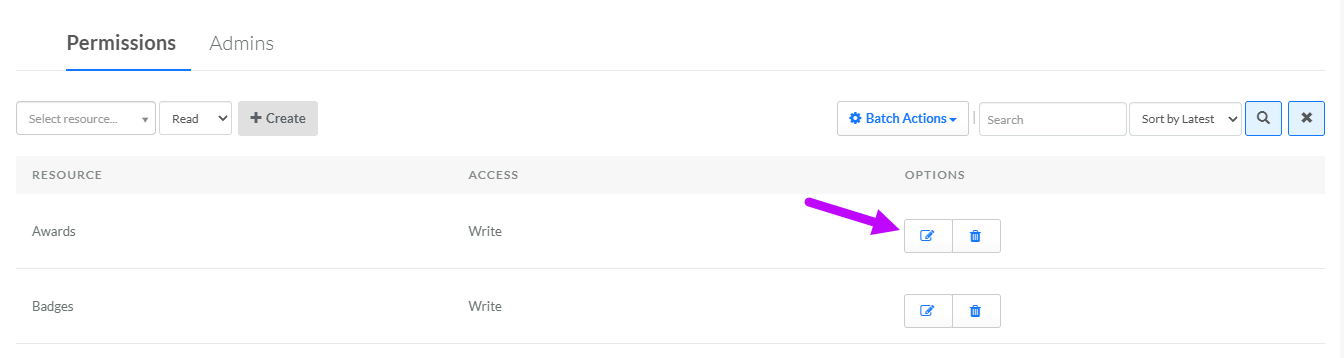
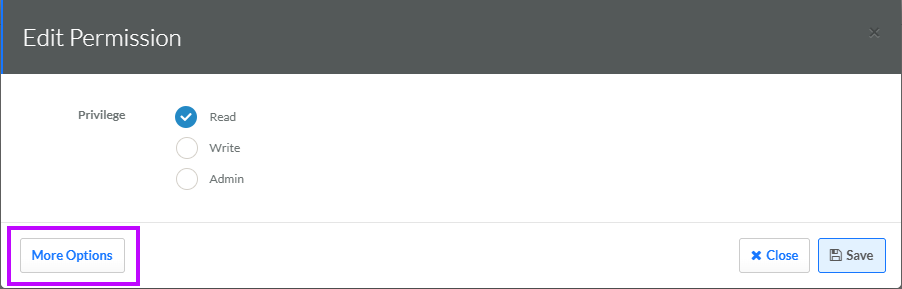
Once you find the desired resource, in the Options column, click the Edit icon. The Edit Permission pop-up window is displayed.
-
Select the desired access level.
-
Click Save.
Configure the Dashboard Permission
The Dashboard resource provides a custom access level unique to this resource. In addition to the common Read, Write, and Admin access levels, the Dashboard permission offers a more granular custom setting for the Read privilege. When this custom setting is enabled, a user with Read privileges can also export a Dashboard (typically, access to exports is limited to Write and Admin privileges). This custom setting is intended to be used by data analysts and accountants who need to export Dashboard data, while still maintaining appropriate read-only access controls.
To enable the custom access level for the Dashboard permission:
-
Add the Dashboard resource to the Role as described above, being sure to select the Read access level.
-
In the Options column of the Dashboard resource, click the Edit icon. The Edit Permission pop-up window is displayed.
-
Click More Options.
-
Check Export Analytics.
-
Click Save. Within the Permissions tab, the Access column for Dashboards will read "Custom."
Conversely, if you need to disable this custom access level, navigate to the Edit Permission pop-up window for the Dashboard resource as described above, then click Revert To and select one of the standard access levels. A confirmation dialog box is displayed; click Confirm.
Remove Permissions from a Role
The platform supports two methods of removing permissions from a Role. First, you can remove the permissions one at a time for specific resources. Second, you can automatically remove all permissions.
Individually Remove Permissions
To individually remove one or more permissions from a Role:
-
Select Admin from the top navigation bar, then select Access > Roles from the side navigation menu. The Roles screen is displayed.
-
Optionally, search for and select the desired Role (see Search for a Role for more information on the available search options). The Role Details screen is displayed with the Permissions tab selected.
-
Optionally, search for the desired resource by entering all or part of the resource Display Name or Internal Name in the search field. Click the Search icon. The screen is refreshed to show only the resources that meet your search criteria.
-
To sort the search results, select the desired sort order from the Sort By drop-down menu. The default sort order is by most recently added.
-
Once you find the desired resource, in the Options column, click the Delete icon. A confirmation dialog box is displayed; click Confirm.
-
Repeat the above steps as needed to remove other permissions from this Role.
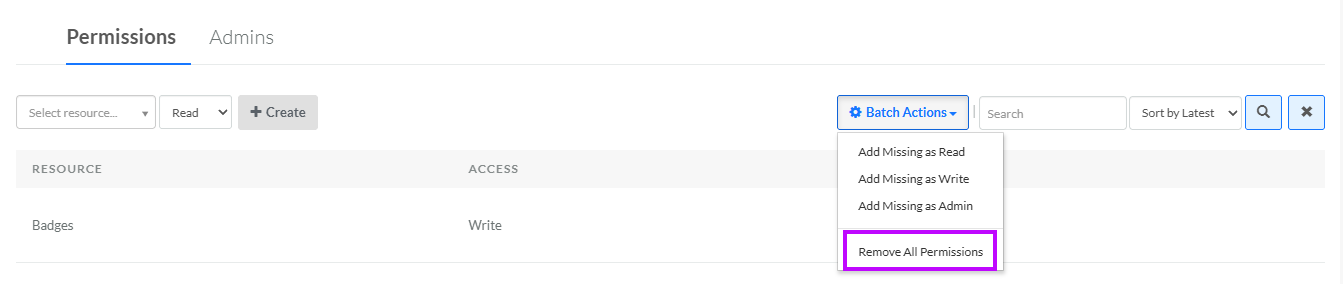
Batch Remove Permissions
To remove all existing permissions from this Role:
-
Select Admin from the top navigation bar, then select Access > Roles from the side navigation menu. The Roles screen is displayed.
-
Optionally, search for and select the desired Role (see Search for a Role for more information on the available search options). The Role Details screen is displayed with the Permissions tab selected.
-
From the Batch Actions drop-down menu, select Remove All Permissions. A confirmation dialog box is displayed; click Confirm. All permissions are removed from the list on the Permissions tab.